

how did i create this centerpiece?

as promised...here's another "hOw diD sHe dO tHAt" tutorial...


i hope this was helpful.
gather your materials:
- the container to house the centerpiece.
you want something deep enough & wide enough to secure the branches
& you want something that corresponds with the feel of the occasion you are hosting.
- branches (store bought OR from your own backyard)
- shovel
- 1" thick round piece of styrofoam
(round is much more versatile & can be cut to accommodate square openings - which is what i ended up doing).
also, the width of the styrofoam should be larger than the mouth of your container.
- white spray paint (i used 1 & 1/2 cans)
- garbage bag (large enough to fit the base of the centerpiece inside of)
- glue gun
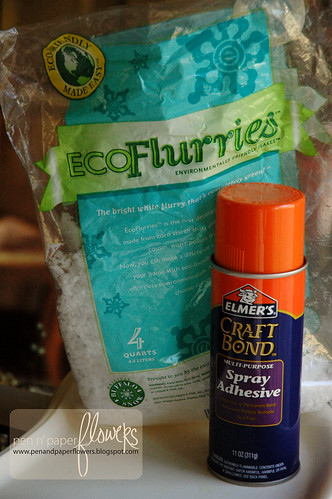
- fake snowflakes (for the base of the centerpiece)
- spray adhesive (for attaching the fake snowflakes at the base of the centerpiece)
- white cardstock (for the leaves)
- scissors
- masking tape (to protect container from spray adhesive)
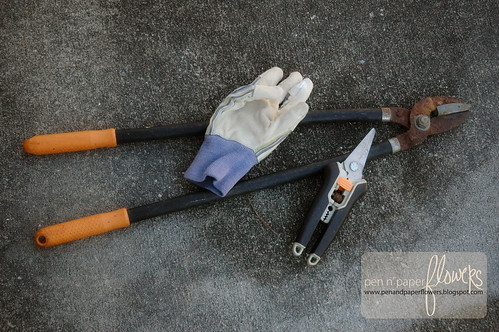
- tools (see below)
gloves, garden shears & tree trimming pliers...
materials for felt bird
- felt 1 - 8.5x11 in each color: hot pink, light pink and black
- filler dried beans, rice, etc.
okay...ready?
first i needed some branches...
i lucked out and we had this leftover pile of branches
from a tree we had trimmed a few weeks ago.
you can also buy branches. i saw some at homegoods for $40 *yikes*
i stuck with the free ones to keep my costs down.
i sorted through the pile,
paying attention to things like shape, fungus, & if they may be too brittle to work with.
i picked out 3-5 branches i thought would work together.
it's sort of like arranging flowers in a vase except they're prickly, awkward, ugly sticks.
i knew the bases of each branch needed to be sturdy and thick.
(it's more "tree-like" and it's much more stable as a centerpiece)

after trimming up the base of each branch - getting rid of those prickly little branches...
i filled my white pottery-barnish container with sand.
i left just enough room for the styrofoam to sit on top. (boy was it heavy).
my goal was to have the styrofoam rest flesh up against the surface/ledge of the container.
i took my circular piece of styrofoam and started "shaving" off one side at a time
until i was able to achieve a TIGHT fit on top of the sand.
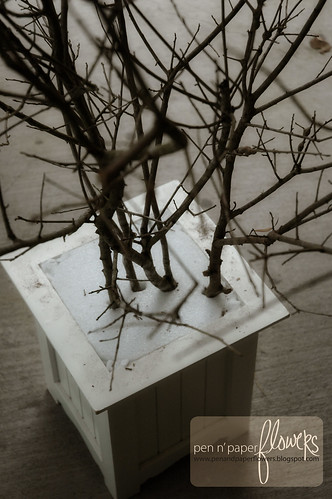
then i stuck my branches into the styrofoam and pushed them all the way down
through the sand until i felt they were anchored.

see how snug the styrofoam is?
i even took the extra shaved pieces of styrofoam & filled in the corners of the container.

it's beginning to transform....
now is the time for trimming/refining the look of the centerpiece.
i placed the centerpiece as-is on a table on my backporch.
this allowed me to have a better sense as to how the centerpiece would actually look on the final dessert table.
i wanted my branches high enough to give height to the table but not inhibit possible lighting hanging above the table.
i also wanted to make sure the branches weren't going to prevent people from selecting food from the table. (you don't want to poke anyone's eye out or have people stabbed as they admire the table....*laughing*)
knowing the guests at the shower would be circling the dessert table, i walked around the centerpiece while using my garden clippers to trim the tree branches. i even ended up pushing the branches further down into the sand to help take off some of the height.
if your centerpiece is going to butt-up against a wall and your guests won't be circling the table, the back of the centerpiece will need to be trimmed "flat".
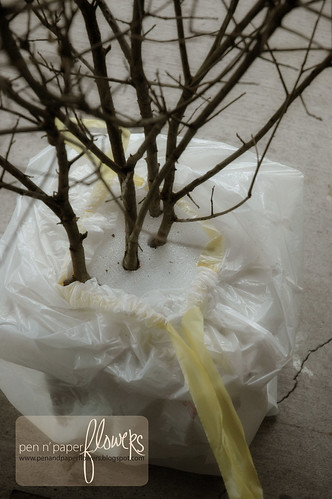
next comes the spray paint.
i wrapped a garbage bag around the container to protect it.
after the branches were sprayed white - (which took several applications & drying time in-between) - i was ready to add snow to the base.
keeping the garbage bag on but allowing the full top of the centerpiece to be exposed, i applied masking tape around the edge of the container. (like when you tape-off trim before painting)
i gathered my fake snow & spray adhesive.
i sprayed the adhesive and quickly added the fake snow to the base of the centerpiece.
i kept doing this until i had the desired amount...
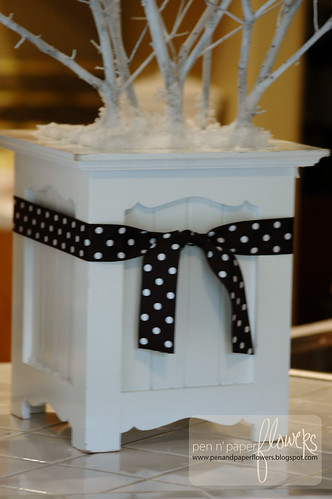
and then of course i added the coordinating ribbon
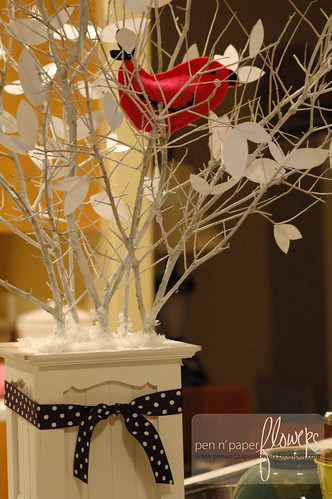
time to add leaves...
while my glue gun was heating i grabbed my white cardstock and started free-hand cutting leaves. nothing special...just three different sizes of leaves....and a lot of them.
i started randomly applying them with the glue gun...
adding more....and more...until i got the look i was wanting.

the felt bird...
first off...i DON'T sew...i'm a glue-gun kind of gal...
i just used a piece of white cardstock to cut out a quick template of a bird. (just freehand)
based off of the bird used on the invitation and the penelope nursery bedding from pottery barn kids.
i made sure to fold the hot pink felt in 1/2 so as to only have to trace & cut one time. PLUS, this allows for both sides to be perfectly matched up.
after placing the bird template on the folded hot pink felt, i traced the template with a pen.
i then used scissors to cut out both sides of the bird at once.
i "freehand" cut the eyes, beak, pink cheeks, tail and squiggly line on the bird with the corresponding felt colors.
using my hot glue gun I applied the bird accents and sealed the bird closed EXCEPT for a small opening.
i added the filler and sealed it completely.
it took me about 15 minutes to do the bird...it was seriously that easy.
and there you have it...
a centerpiece i created over the span of about 3 days.
you could EASILY finish this in a few hours but i had many interruptions
and limited "focus" time. *wink*
i try to keep the tutorials short and sweet without missing too much detail.
if you have further questions just shoot me an email: www.pnpflowers@live.com
one of my goals for 2010 is to add a "keeping it real" blip to the bottom of my posts...
this allows readers to know i'm human and not a "pretend-to-be-perfect" kind of gal.
it may also help remind me what NOT to do next time as well as prevent readers from making
the same mistakes i may have made through the process...*wink*
so here we go with the first official what i call..."KIR blip"
KEEPING IT REAL:
- some leaves fell off & branches got broken trying to transport the centerpiece...didn't fit through doorways or into the car very well...*wink*
- boy was this thing heavy due to the sand as filler...at least 30lbs...prob. 40lbs...i'm not even kidding.
- i was getting very irritated while trying to pick out the branches. those prickly little things kept stabbing me. gloves recommended.
14 comments:
Thanks for posting this. I'm thinking of doing a tree centerpiece for my daughter's birthday party and your tips are most helpful.
I just created lollipop invites, you can see them on my blog, jolainefrias.blogspot.com
I love your idea its beautiful and inexpensive, i am always looking for new ideas for all my parties i will use this for my sister in laws babyshower.
Hello. I love the box centerpiece. Would you know where I could find one? (meowej-photo@yahoo.com) Thanks!
HI Anonymous...
The centerpiece container actually came from the Target gardening section a couple of seasons back.
I hope you can find something similar...
This is regarding the Centerpiece Tree you created. What type of tree were these branches cut off?
Hi Anonymous...This was from an oak tree I had recently cut back. I hope that helps...
And thanks for stopping by...
I am making this centerpiece for my sister's baby shower. I wanted to know what type of tree did you you cut these branches from?
Hi Julia...I used some branches from an oak tree I had recently trimmed back. Have fun celebrating with your sister. If you have any other questions, don't hesitate to ask! Have a great weekend!
Love this! Just what I was envisioning for my friend's bird themed baby shower. Thanks for they tutorial.
Michelle...I'm thrilled you found the tutorial helpful!! Have fun hosting the baby shower for your friend!!
I cannot find the same center piece or even similar to the one you used, can you direct me to a place/store where I can purchase one like yours?
Thank you
What are the measurements to your centerpiece?
Hi Anonymous...
Thanks for your inquiry regarding the centerpiece...
I purchased the container in Target's Garden Center (when they actually HAD Garden Centers). *wink*
Measurements - these are approximate:
12"x12" square
14" high
I hope that information helps...let me know if you have any other questions...
- Jessica
Post a Comment