Blog Widget by LinkWithin

HOME | Entryway Photo Art

Thursday, December 10

Yes, it's true...I might not have very many Christmas decorations up around my house just yet...
despite being about two weeks away from the big day!!

I did, however, put something else up this week that is near + dear to my heart and that will add a very special touch to our home this holiday season and far beyond that...

Three new 24x36 photo canvases from Shutterfly of all three of my girls

I've been wanting to do something like this for some time now and finally made it happen using Shutterfly's "Design-A-Wall" feature. It really made the entire process super easy - from selecting the right photos, creating the perfect layout as well as physically hanging the art on the wall.

Since I've been dreaming of oversized artwork of my girls for some time now, I knew I wanted to go BIG and fill as much of the wall in our entry as I possibly could. I was looking for a high-impact result and I got it!! I think color photos would've been really pretty too but I chose to go with black and white because of the timelessness they evoke. 

Want to know how easy it was to make this happen?

PICK THE PHOTOS
Even though I toyed with the idea of using photos of the girls when they were each two years old,  (how fun would that be?), I ultimately decided it was more important to make sure I selected photos of each girl that had similar backgrounds and lighting since they would be grouped together. I narrowed it down to a few of each girl from our Christmas Photo Shoot last year.

PICK THE ART MATERIAL 
Now all I had to do was decide which art material I wanted the photos to be printed on.
There are six different options to choose from on the Shutterfly website - see below. I admit choosing the art material was a little tough because the wood and metal artwork sounds WAY cool but I ended up selecting a more tradional option - canvas. It's easier on the wallet and they are light as a feather which makes hanging them even easier.


PICK THE PHOTO ARRANGEMENT
Shutterfly offers quite an array of pre-arranged photo layout templates to pick from. I measured the wall in the foyer where my artwork would be hanging to narrow down the selections based on what would work best in my space. I went with the 78x36 Layout - see below.


UPLOAD YOUR PHOTOS
Next, I uploaded the photos I'd previously decided on to the Shutterfly website and inserted them into the template.


CROP PHOTOS 
In order to give a more cohesive flow to the photos I selected, I had to crop Ema and Clara's photos so their faces filled up more of the frame/canvas. Notice how it looks as if Clara is tall and Ema is short in the original upload and layout? (see above).


This was super easy to fix by just clicking on the photo I wanted to crop which then took me to an editing window where I created a box around the area I wanted to zoom in on. (There are other editing tools to choose from as well like adding a filter, removing red eye and even rotating the image if you need to).


Isn't that a lot more balanced now after having cropped both Clara and Ema's pictures? (see below)

ADD TO CART + PLACE ORDER
With my photos uploaded and cropped, I just pushed "Add to Cart" and placed my order.

Notice the little exclamation marks in the upper left of each photo? That's a warning from Shutterfly that the resolution on my images may not be high enough for a good quality print. I personally ignored the warning and went ahead and placed the order - hoping it would all turn out all right - and they still printed beautifully! (tossing the confetti)


DISPLAY THE ARTWORK
When the order shipped, there was a handy dandy paper template that was sent separately which also included "Easy Hang Guide"instructions and a small level in a tiny envelope. (see all three below)


I unrolled the paper template right on the dirty floor of the foyer and just followed the written instructions.

Keeping It Real Disclaimer
I was too lazy and too focused on getting these canvases hung to bother moving the pot of wilted mums belonging to Clara or our dog's tennis ball from the photo. 
And all of that junk on the right is spilling out of my studio. 
This is real life folks.

First thing the directions mention is to attach the self-adhesive level to the paper template in the "PLACE LEVEL HERE" spot at the top. So I did just that.


With the level on my paper template, I grabbed some painter's tape and a ladder and managed to hang it up on the wall all by myself since no one else was home. (I recommend enlisting the help of someone if you are hanging something this wide because it would be a lot easier to manage). *wink*

At first I used some cheap painter's tape to attach it to the wall. I somehow managed to get it straight after a few adjustments, a lot of up and down on the ladder and a little huffing + puffing wishing one of the girls was home to help. I even considered putting off the project until someone got home but I was too stubborn + excited and wanted to get it hung up to surprise everyone. Besides all of that, I really wanted to prove to all of you that you could really do this project all on your own.


I stepped off the ladder and because I used the cheap painter's tape...this started to happen. (see below) Oh heck no! After all of that "up and down and back and forth" business, eyeing the level and getting it just right, I found myself repeating the process all over again. So frustrating.


So then I reached for a wider (and higher quality) painter's tape I had here at the house and went to town by applying double strips of tape to all of four corners of the paper template. This was a much better call and I should've just done that in the first place.


Once the paper template seemed nice and level and was positioned on the wall exactly where I felt the photos should be, (and was hanging securely this time),  I referenced the key at the bottom of the template to determine where to place the holes to mark the wall for hanging.


Since I have canvas prints, spot "A" was where I needed to push a nail through the paper. There were 3 "spot A's" because I was hanging three different canvases.


After I made 3 holes in the wall, I took down the paper template I had just worked so hard to hang and proceeded to hang up each canvas using one nail. (the canvases come with a mounting bracket you hammer into the back of the canvas frame - easy). And Voila!! They are up!!


They look awesome and it really was easy - and they were level!!  So important!!
I pushed the antique church pew back into it's position and just added a couple of items to make it seem a little more decorated - just so I could get a final photo to post here. *wink*


And if you are thinking the canvases seem pretty high up on the wall, you are right. And there were two thoughts behind this decision:

1. I wanted to make sure I was adding more height to this space by placing them closer to the ceiling and eliminating a lot of empty space above the photos.

2. My goal is to add some wood work to this entry eventually, perhaps in the form of wainscoting or maybe even some faux shiplap? If I go with the wainscoting, I want it to be pretty high up so that it would be taller than church pew.


I am so happy with how this Shutterfly project turned out.
I love that when someone walks into our home now, they will immediately see the three most beautiful + important things in my life.

If you've been toying around with the idea of creating a space in your home with some high impact visuals of your family, I would highly recommend using Shutterfly to help you create the perfect space.

::::::::::::::::::::::::::::::::::::::::::::::::::::::::::::::::::::::::::::::::::::::::::::::::::::::::::::::::::::::::::::::::::::::::::::::::::::::::::::
THIS IS A SPONSORED POST BY SHUTTERFLY.  
PEN +  PAPER FLOWERS HAS RECEIVED COMPENSATION AND/OR PRODUCTS 
IN EXCHANGE FOR SHARING...BUT FRIENDS…AS ALWAYS...
ALL OPINIONS ARE MY OWN + I ONLY SHARE PRODUCTS + IDEAS  I LOVE + ADORE.
::::::::::::::::::::::::::::::::::::::::::::::::::::::::::::::::::::::::::::::::::::::::::::::::::::::::::::::::::::::::::::::::::::::::::::::::::::::::::::

KEEPiNG iT REAL
Of course, now that I've got some beautiful artwork hung up in the entryway, now I'm forced to have to add a new rug, perhaps paint the inside of the front doors, replace the light fixture and add a little more charm to the space. *wink*

I am fully aware that decorating a home is a life-long project. I giggle to myself when I hear people express their desires to finally be "done" with a specific space they've been working on. Really? Because being "done" never really happens for me. I LOVE changing things up too much to ever think something will ever be final or permanent. Anyone else like that?

PHOTOGRAPHY | Photo Session • Emma

Monday, September 10

Among some super fun projects I was able to get done this weekend...
I was also able to dust off my digital SLR...
and participate in a photo shoot for one of my daughter's friends, Emma.

This beautiful girl had never had her photos done professionally before...
I was happy to oblige.
These are just a few of my favorites...
emmaCOLLAGEwmSM


KEEPiNG iT REAL
If you haven't noticed lately...
I've rarely been pulling out my trusty Nikon.
I've pretty much been doing everything with my iPhone.
It's super quick - pretty much instant...
so I guess that means I'm either getting lazy...
or we could just say I'm getting more proficient with my time. *wink*

Looking forward to sharing some of the other projects I got to work on...
including the results from the ABANDONED DRESSER.

hOw DiD sHe dO tHAt?: tree centerpiece

Monday, January 11

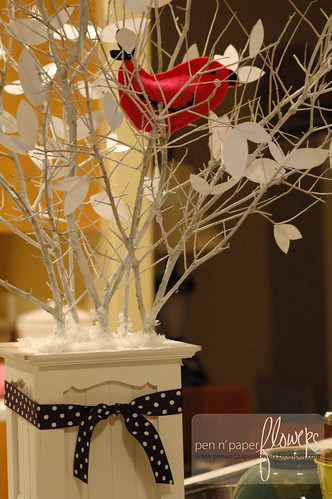
how did i create this centerpiece?


as promised...here's another "hOw diD sHe dO tHAt" tutorial...

gather your materials:

- the container to house the centerpiece.
you want something deep enough & wide enough to secure the branches
& you want something that corresponds with the feel of the occasion you are hosting.
- branches (store bought OR from your own backyard)
- shovel
- 1" thick round piece of styrofoam
(round is much more versatile & can be cut to accommodate square openings - which is what i ended up doing).
also, the width of the styrofoam should be larger than the mouth of your container.
- white spray paint (i used 1 & 1/2 cans)
- garbage bag (large enough to fit the base of the centerpiece inside of)
- glue gun
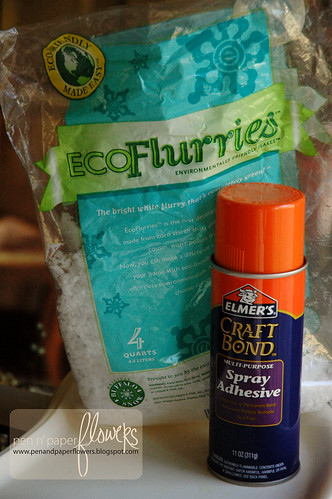
- fake snowflakes (for the base of the centerpiece)
- spray adhesive (for attaching the fake snowflakes at the base of the centerpiece)
- white cardstock (for the leaves)
- scissors
- masking tape (to protect container from spray adhesive)
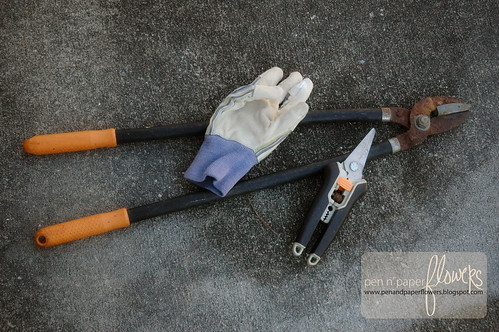
- tools (see below)


gloves, garden shears & tree trimming pliers...

materials for felt bird
- felt 1 - 8.5x11 in each color: hot pink, light pink and black
- filler dried beans, rice, etc.

okay...ready?


first i needed some branches...
i lucked out and we had this leftover pile of branches
from a tree we had trimmed a few weeks ago.
you can also buy branches. i saw some at homegoods for $40 *yikes*
(you could also check at michael's, joann's or other craft stores)
i stuck with the free ones to keep my costs down.


i sorted through the pile,
paying attention to things like shape, fungus, & if they may be too brittle to work with.
i picked out 3-5 branches i thought would work together.
it's sort of like arranging flowers in a vase except they're prickly, awkward, ugly sticks.


i knew the bases of each branch needed to be sturdy and thick.
(it's more "tree-like" and it's much more stable as a centerpiece)

after trimming up the base of each branch - getting rid of those prickly little branches...
i filled my white pottery-barnish container with sand.
i left just enough room for the styrofoam to sit on top. (boy was it heavy).
my goal was to have the styrofoam rest flesh up against the surface/ledge of the container.


i took my circular piece of styrofoam and started "shaving" off one side at a time
until i was able to achieve a TIGHT fit on top of the sand.
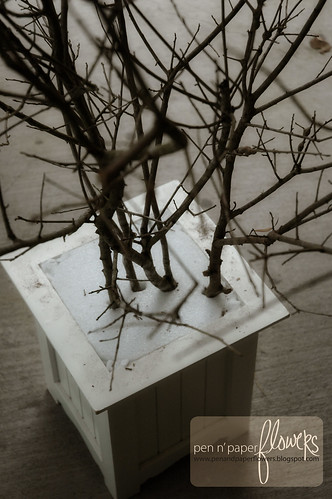
then i stuck my branches into the styrofoam and pushed them all the way down
through the sand until i felt they were anchored.

see how snug the styrofoam is?
i even took the extra shaved pieces of styrofoam & filled in the corners of the container.

it's beginning to transform....


now is the time for trimming/refining the look of the centerpiece.
i placed the centerpiece as-is on a table on my backporch.
this allowed me to have a better sense as to how the centerpiece would actually look on the final dessert table.
i wanted my branches high enough to give height to the table but not inhibit possible lighting hanging above the table.
i also wanted to make sure the branches weren't going to prevent people from selecting food from the table. (you don't want to poke anyone's eye out or have people stabbed as they admire the table....*laughing*)

knowing the guests at the shower would be circling the dessert table, i walked around the centerpiece while using my garden clippers to trim the tree branches. i even ended up pushing the branches further down into the sand to help take off some of the height.

if your centerpiece is going to butt-up against a wall and your guests won't be circling the table, the back of the centerpiece will need to be trimmed "flat".


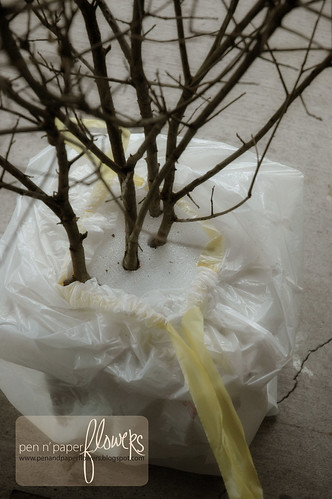
next comes the spray paint.


i wrapped a garbage bag around the container to protect it.
after the branches were sprayed white - (which took several applications & drying time in-between) - i was ready to add snow to the base.

keeping the garbage bag on but allowing the full top of the centerpiece to be exposed, i applied masking tape around the edge of the container. (like when you tape-off trim before painting)


i gathered my fake snow & spray adhesive.


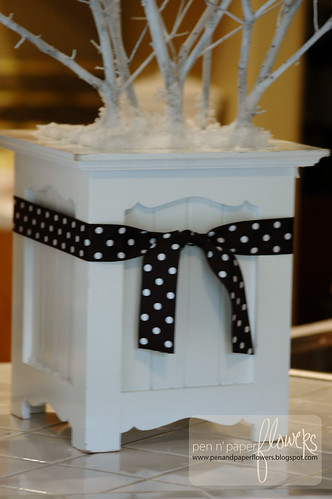
i sprayed the adhesive and quickly added the fake snow to the base of the centerpiece.
i kept doing this until i had the desired amount...

and then of course i added the coordinating ribbon


time to add leaves...
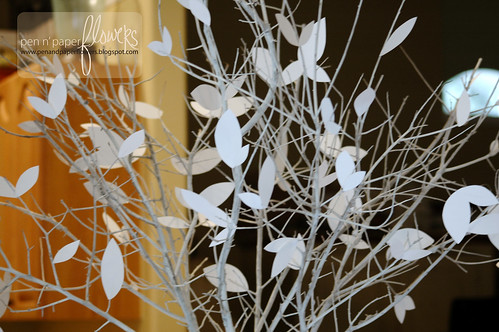
while my glue gun was heating i grabbed my white cardstock and started free-hand cutting leaves. nothing special...just three different sizes of leaves....and a lot of them.


i started randomly applying them with the glue gun...


adding more....and more...until i got the look i was wanting.

the felt bird...


first off...i DON'T sew...i'm a glue-gun kind of gal...

i just used a piece of white cardstock to cut out a quick template of a bird. (just freehand)


i made sure to fold the hot pink felt in 1/2 so as to only have to trace & cut one time. PLUS, this allows for both sides to be perfectly matched up.
after placing the bird template on the folded hot pink felt, i traced the template with a pen.
i then used scissors to cut out both sides of the bird at once.
i "freehand" cut the eyes, beak, pink cheeks, tail and squiggly line on the bird with the corresponding felt colors.
using my hot glue gun I applied the bird accents and sealed the bird closed EXCEPT for a small opening.
i added the filler and sealed it completely.
it took me about 15 minutes to do the bird...it was seriously that easy.


and there you have it...
a centerpiece i created over the span of about 3 days.
you could EASILY finish this in a few hours but i had many interruptions
and limited "focus" time. *wink*

i hope this was helpful.
i try to keep the tutorials short and sweet without missing too much detail.
if you have further questions just shoot me an email: www.pnpflowers@live.com


one of my goals for 2010 is to add a "keeping it real" blip to the bottom of my posts...
this allows readers to know i'm human and not a "pretend-to-be-perfect" kind of gal.
it may also help remind me what NOT to do next time as well as prevent readers from making
the same mistakes i may have made through the process...*wink*
so here we go with the first official what i call..."KIR blip"

KEEPING IT REAL:

- some leaves fell off & branches got broken trying to transport the centerpiece...didn't fit through doorways or into the car very well...*wink*
- boy was this thing heavy due to the sand as filler...at least 30lbs...prob. 40lbs...i'm not even kidding.
- i was getting very irritated while trying to pick out the branches. those prickly little things kept stabbing me. gloves recommended.

you don't see this everyday...

Thursday, January 7

in florida, you don't see this ANY day....
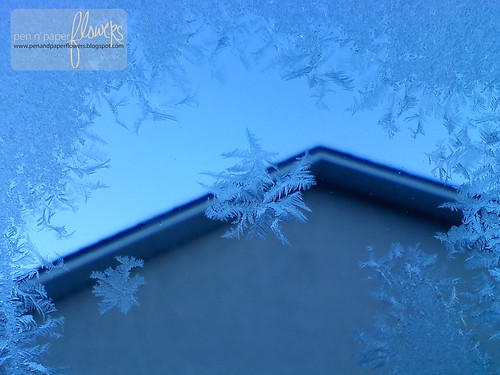
but this is what we woke up to...


can you believe it?
"florida snowflakes"
that's what i'm calling them anyway. *wink*
beautifully collected all over my wind shield.
aren't they beautiful?
so delicate.
so tiny.
so perfect.
so amazing...really.
when i got in the truck with em to take her to school we were mesmerized by them as we sat shivering in the truck...

so...with such a unique experience...
we just HAD to take pictures with my phone.
yes...these are pictures from my phone!?
"straight-out-of-the-phone-perfection"...wouldn't you agree?
pretty good, right?
totally unrehearsed.
totally perfect.
amazing.

so call them what you want.
and if they aren't really snowflakes then shhhh....don't tell me or ema. *wink*

i think they're beautiful.
what a magical way to start our day together.

pssst....there's a rumor there may be snow flurries tomorrow morning....GET. OUT.

thanksgiving 2009

Saturday, November 28

what a day.
what a BEAUTIFUL day.
clear skies & sunshine.
high's in the low 70's.
perfection.


first...the pumpkin cupcakes i made...
inspired by mysweetandsaucy.com (see this post).

ella riding "junebug"
ema at ella's side and kalie holding junebug steady.
yes...i was very nervous when i realized susan had put ella on the horse.
i mean look how little ella is compared to how monstrous the horse is...


but she looked so darn cute up in the saddle. doesn't she?
one handed...what's up with that? like she's been riding her whole life! *wink*


the only picture i got of ema all day.
she was mad. she did NOT want her picture taken.
she wanted to be doing what clara was doing...


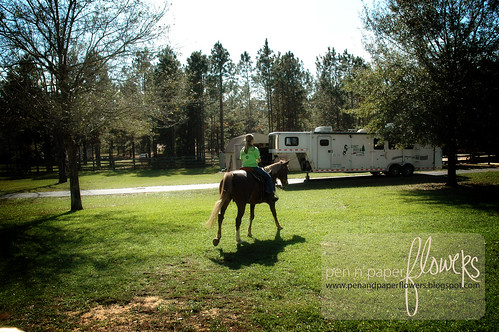
this is what clara was doing.
she recently learned to canter with junebug and now that's all she thinks about.
and this was my only picture of clara all day...


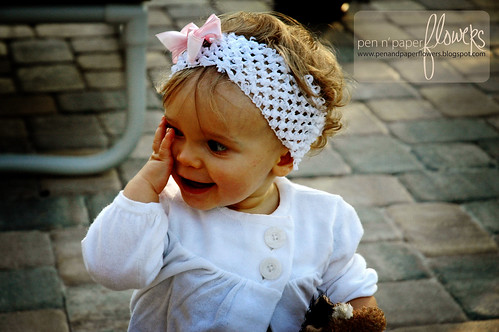
ella playing "peek-a-boo"


one-handed "peek-a-boo"
her other hand was occupied with the dog toy she was carrying.


holly & madison
lovin' madi's lips!


todd, chrystal, cody & cooper

ron & wendy

susan, dan, nate, kalie & beau
(& the canines...cutter & bruiser)


my fave picture of the day...

no pictures of me or j this year.
nonetheless, we had a nice day out at susan and dan's.
we appreciate them hosting the thanksgiving dinner this year.
lots of good food and good company.

i hope you had a wonderful thanksgiving weekend as well - with your friends/family/loved ones.

xxo,
jessica
CopyRight © | Theme Designed By Hello Manhattan