DISCLOSURE: This project is being considered for a prize from Cricut.
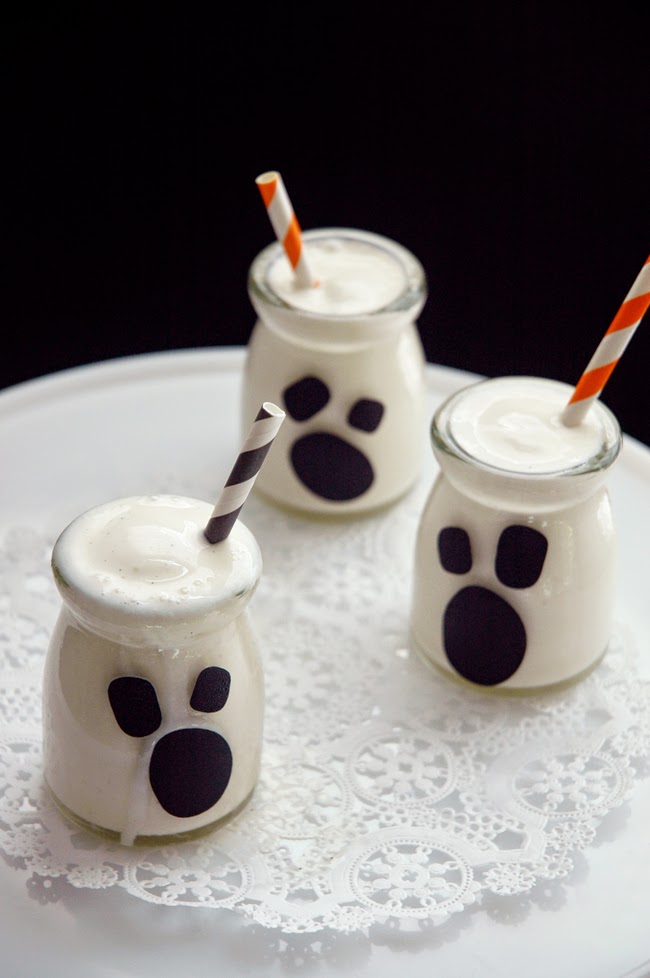
Are these not the cutest
Mini Monster Milkshakes you've ever seen?
I'm in love with them!! The
adorable bottles from The TomKat Studio are the perfect backdrop for creating these Mini Monster Milk Jars using your
Cricut Explore® -
or a pair of scissors…
if you have the patience for the intricacies of the "Frankenstein" faces. *wink*
Yep! You guessed it. It's time for another
Cricut Design Space Star Challenge.
My team and I chose a "Black and White" theme for our projects to go along with the pre-determined Cricut topic: Holiday Home Decor + Gift Ideas.
I thought these mini milk jars were perfect to share as they not only add some
fun decor to your Halloween celebrations…but they'd make
super cute favor jars filled with colored Sixlets® as well!! (
these jars come with lids too - yes…yes they do!! - 4th picture from the bottom of the post).
What's surprising is that although
all of these faces are unique…they were
created from only two simple facial designs…a ghost face and a frankenstein face. I just
mixed up the different elements (eyes, mouths) and even changed the size on a couple to create some real "monsterpieces". Ha! (I'm such a dork).
I think the Frankies are my faves!!
The bottles are filled with milkshakes…vanilla for the Ghosts and mint chocolate chip for the "Frankies". A little ice cream + splash of milk…blend it up and pour it in. You could also do healthy green smoothies for the Frankies too!! And of course…don't forget to add a
cute party straw. (
cut a normal straw in two).
WHAT YOU MUST KNOW
Before I get started on the "How-To" for creating the monster faces…please know that you can make them using
black vinyl OR white card stock. I made mine using black vinyl…BUT I wanted to experiment with the
brand-new "Print the Cut" feature on the Cricut Explore® -
which allows you to print an image onto your home printer first and then feed it into your Cricut Explore® for cutting! Yeah. Pretty freaking amazing.
So…
the images you see here were cut from black vinyl but you could totally do it with card stock too. The card stock isn't moisture-resistant like the vinyl but would work just fine if the jars were filled with candies!
So…enough with the ghoulishness…let's get on with the how-to for making these fun Halloween treats.
SUPPLIES NEEDED
1 set of
printable Mini Monster Milk Jar Bottle Faces - Pen N' Paper Flowers
1 set of
12 Mini Glass Jars - The TomKat Studio
1
Cricut Explore® Cutting Machine
12x12 Standard Cutting Mat
White Card Stock or Black Cricut® Vinyl
STEP ONE
STEP TWO - SELECT & DELETE
Use the "Select & Delete" option to erase the white background of the image.
Just click anywhere on the white background and it will disappear
STEP THREE - ERASE
Use the "Erase" tool to erase the black text on the image - push "Continue" when done.
Leave behind only the portions you want the machine to cut.
I figured out later I could've probably used the "Crop" feature (upper right) to select the images I wanted to cut instead of the "Erase" feature but hey…I'm still learning the ins and outs of the machine! *wink*
STEP FOUR - SAVE IMAGE
Save the image after naming it and adding tags in the boxes over to the right.
STEP FIVE - SIZE IMAGE
I made sure mine was about 8" wide (see below)
STEP SIX - PREP FOR PRINTING
In the layers box, click on the tiny printer icon.
This opens the pop-out window to the left showing the "print" feature.
***Skip this step if you are cutting from black vinyl and will not be printing***
Vinyl users can just push the "Go" button and load black vinyl into machine for cutting.
STEP SEVEN - PRINT & CUT
After you've printed your image using your personal printer, place your paper on your Cricut® Cutting Mat and follow the onscreen directions to load and cut your image. I used white card stock.
See those 3 L-shaped marks on the paper I printed? Those are a really important part of the Cricut Explore® "Print then Cut" feature. They are what the machine reads to ensure proper alignment before the cutting process begins. It's pretty cool…and amazing! See more photos below.
If you are using the new Print & Cut feature for the first time you will have to calibrate your Cricut Explore® machine first - the software walks you through the steps to do that.
If you have ANY issues at all you can call Customer Support at 877-7CRICUT
See that little beam of light shining onto the paper from underneath the cutting carriage?
That's the machine reading the crop marks…prepping for cutting. It starts with the crop mark on the top left, moves over to the top right crop mark and scrolls down to the bottom left one.
It's so cool to watch it in action!!
And now it's cutting…look at how precise the cuts are?
Maybe you can't even tell what parts have already been cut because the cutting detail is amazing?
Here it is…all finished cutting.
I peeled up the white card stock and left the black images stuck to the mat.
STEP EIGHT - MIX & MATCH
Mix and match the assortment of eyes and mouths to create a variety of faces.
Just by angling/tilting them a little differently makes a big difference in their appearances too!
For those of you who don't have a
Cricut Explore® you can still print the FREE
printable Mini Monster Milk Jar Bottle Faces onto a piece of card stock and then use a pair of handy scissors to cut them out. Use your favorite adhesive to stick them on.
Hope you love the project, friends!!
I'll be sharing the rest of the fun, creative things Team 14 came up with….soon!!
KEEPiNG iT REAL
I think I kept these in the freezer for a week before I was able to actually photograph them!
You'd never even know!! Ha!!


